Just a reminder that to some extent this is a legacy blog aiming to rescue and record family recipes. I’m hoping that they will be used by children, nieces, nephew, cousins and more - maybe even random Hungarians who stumble upon this site.
These are long instructions, but important for food safety and success.
I’ve researched best practices for this authentic, delicious, iconic Hungarian sausage. [And if this all seems like too much information - please don’t be grumpy - feel free to click away and visit other sites.]
For years we have spent Family Day with good friends - and sometimes even family - making sausages. Using inherited equipment (some made by my Dad) we make Hungarian kolbasz (my family’s recipe for a paprika sausage - here’s the recipe) and Italian sausage (here’s the recipe). I’m adding the Hurka one now to make sure I will remember every detail.
In 2021, this Family Day tradition could not happen, but Mr. KB and I channelled our sausage energy into replicating - for the first time ever - my family’s hurka sausage.
About Hurka | Jump to Ingredients | Jump to What You’ll Need | Jump to Workflow | Jump to Recipe
A few times we helped my grandparents/parents make this sausage, but I was left with not 100% clear memories (other than the wonderful taste) and two somewhat vague/confusing recipes in my mom’s handwriting. While some sausage recipes these days are “small-batch” - using only 1-2 lbs. of meat yielding just a few sausage coils, one of my mother’s recipes had over 24 lbs. of ingredients!!
I spent hours studying her recipe and comparing it to online recipes - and to be honest there were not a lot of them, especially recipes that matched what we used to make. As is often the case with many culturally iconic dishes, the recipes vary by region and family. My maternal family is from Rakamaz.
About Hurka
You can skip this section if you are not interested in variations and history.
pork is central to Hungarian cuisine and it seems that (historically and even today) these sausages were linked to an annual event in village/peasant life - slaughtering the family pig; the sausage became a way to use as many parts of the pig as possible, so some recipes even add heart and other internal organs to Hurka.
As mentioned above, some people add blood and then it becomes a dark blood sausage - not Hurka IMHO.
In my family, when we were making this with my grandparents, they did in fact include “lung”. I recall my grandmother washing it carefully. In my opinion, they did not grind it well enough and I hated the texture, spitting it out or picking through my plate to avoid eating it. Even though some contemporary books and online recipes still refer to lung, I’m not sure it is even available for purchase. In any case, I will never use it.
I stumbled upon variations in seasoning and methods which I detailed in Notes at the end. The family recipe uses only salt and pepper. Many recipes mention using a wee bit of marjoram. I do not recall my family using that and it is not in their notes, but we did add 2 pinches.
Ingredients
Makes about 10 lengths of sausage - each about 2 feet long
4 lbs. of uncured (not smoked) pork belly (trimmed = skin is removed; ask butcher to do that or do it yourself)
4 lbs. of fatty pork such as pork butt
3 lbs. of pork liver (can be prepped and cooked the day before)
4 cups uncooked long grain rice
4-6 Vidalia (sweet) onions (800-1000 g) (can be prepped and cooked the day before)
salt and pepper
2-3 TB lard
sausage casings
marjoram (optional)
2 bay leaves (optional)
black peppercorns (optional - and cheesecloth if using)
What you'll need - and need to consider
Sausage making is typically a winter activity. Why? Because food safety precautions demand some attention to the temperature of ingredients. Unless you have a large fridge with lots of space, a cold winter day permits you to use your garage as an extended fridge.
Ingredients may need to be ordered. Pork liver in particular may be hard to get at your local grocers. Aim to deal with a reputable butcher. (One site mentioned that it’s best to avoid liver from an older animal because it tends to be bitter.)
Whereas other sausages we make use raw meat, everything in this recipe is cooked before mixing. Hence there are extra hours of prep and extra time waiting for things to cool under safe conditions. Having twice earned my Food Handling Certificate, my most outstanding memory is the danger linked to rice. Cooked rice, if left for a while at room temperature, grows bacteria in the warm core of the cooking or serving bowl, causing severe illness. (Google ‘cooking rice bacteria’ for countless sites talking about this.) The safest way to cool rice (and the meats) is to spread them out. So we used 5 rimmed cookie sheets for all the cooling steps.
As mentioned above, rimmed bake sheets come in handy.
The meat for these sausages is cooked first and for the quantity in this recipe, you’ll need a large soup pot. - ours is 16 qt. If you cut the recipe in half you should be able to manage with a full-size Dutch oven.
Best to have sharp knives to cut ingredients into 1” chunks.
You’ll need a meat grinder. (Stand mixers such as Kitchen Aid have nice attachments for this purpose.)
A large mixing bowl (16 qt, 5.5” deep and 16'“ across) will be needed for the final mixing of all ingredients.
You’ll need casings and a sausage stuffer (note that the Kitchen Aid attachment mentioned above also comes with a stuffer - though I use the one my Dad made.)
A vacuum sealer is the best way to prepare the sausages for freezing - optimal freshness and no freezer burn. Be sure you have a good supply of vacuum sealer bags.
Workflow
Steps below outline the overall "flow" of the work; this does not replace the detailed instructions in the Recipe section.
We cut the pork belly and pork butt into equal-sized chunks the day before (about 30 minutes). On the next day, it took about 5 hours from start to “finish”. Once done, we let the sausages rest in a cool place for about 30 minutes and then vacuum-sealed them for freezing which took another wee bit of time.
Day before (optional but saves time):
cut the pork butt and pork belly into equal-sized chunks
cut the liver into chunks and remove any sinews/silverskin. (It’s ideal to marinate liver in milk for improved taste/texture. Do this the day before and refrigerate.) (can be prepped and cooked the day before)
measure the rice
chop the onions - no need to aim for a fine chop - once cooked, they’ll be going through a meat grinder. (can be prepped and cooked the day before)
if the casings are frozen, move them to the fridge to defrost
Everything is cooked before going into the casing and that means four separate cooking tasks - pork butt and belly, onions, liver and rice.
Though it may seem odd, the pork is cooked first - in fact, the pork butt and pork belly are cooked together for 1.5-2 hours, until tender.
If you have not done the “day before” tasks, start prepping the other ingredients while the meat is cooking.
While the meat is cooking, sauté the onions.
In the same pan used for sautéing the onions, poach the cut-up liver in the milk used for marinating, adding a bit extra if needed.
After 1.5 hours, check a chunk of pork in the cooking pot and once it is tender, remove the pork butt and pork belly chunks (reserving the liquid). Cool the meat safely.
Cook the rice in the pork/pork belly cooking liquid.
Once cooked, remove the rice (with a sieve), reserving all cooking liquid remaining.
While the rice is cooling, grind and mix together the pork, pork belly, liver and onions. ALL of these should be cool - NOT warm.
Add the cooled cooked rice to the mixture along with any remaining cooking liquid required to achieve a slightly mushy texture.
Season and taste.
Stuff the casings, placing filled coils in a cool place to rest as you work.
Use a vacuum sealer for optimal freezer storage.

Here's the Recipe!
4 lbs. of uncured (not smoked) pork belly
4 lbs. of fatty pork such as pork butt
2 bay leaves
1 TB black peppercorns
16-20 cups water (or more?)
Cut the pork butt and pork belly into 1-2” chunks - the goal is to cut them all into the same size chunks so they will cook evenly. Though it may seem odd, the meat is cooked first.
Add the pork butt/belly to a large stockpot and cover amply with water. In our case, we added about 16-20 cups of water. (After the cooked pork is removed, that same water will be used to cook the rice, so no need to be too stingy about how much water to add.) Add the bay leaves and if adding peppercorns, wrap them in cheesecloth for easy removal.
The pork butt and pork belly are cooked together, uncovered, for 1.5-2 hours until fall-apart tender. Start by bringing this to a boil and then reduce heat to medium/ medium-low, simmering until done. Best to skim off the “scum” (foam) that floats up in the early stage of cooking.
Use a slotted spoon or spider to remove the pork butt/belly. Spread it all out evenly on one or two rimmed bake sheets and place these in a cool place to cool.
4-6 Vidalia (sweet) onions
(total 800-1000 g)
2-3 TB lard
The day before, or while the meat is cooking, chop the onions. A rustic chop will do - they’ll be going through the grinder with the meat eventually.
While the meat is cooking, sauté the onions in the melted lard until soft, translucent and just starting to caramelize. Spread them on a rimmed cookie sheet to cool in a cool location.
3 lbs. pork liver
Cut the liver into chunks and remove any sinews/silverskin; (It’s ideal to marinate the liver, overnight or for a few hours, in milk for improved taste/texture.)
In the same pan used for sautéing the onions, poach the cut-up liver in a small amount of milk and/or water. Take care - overcooking the liver might make it taste bitter. Cook just to the point when there is no more red, raw, bloody appearance. Slightly pink is ok. (On a digital probe thermometer, the liver should measure 70 °C / 160 F.)
Spread the liver out on a rimmed cookie sheet to cool in a cool location.
4 cups rice
At the 1.5-hour mark of cooking the pork butt/belly, begin checking a chunk of pork in the cooking pot and once it is tender, use a spider or slotted spoon to remove the pork butt and pork belly chunks (reserving the liquid which will be a wee bit grubby). Spread the meat chunks on a rimmed cookie sheet to cool in a cool location.
Add the rice to the pork/pork belly cooking liquid, bring it back to a boil and lower the heat, stirring and testing for doneness. Add extra water if necessary. Keep in mind that you’ll be ending up with what could be called “dirty rice” - which refers to appearance only.
When done, remove the rice, reserving all (at least 8 cups) cooking liquid remaining to use in case the final mixture is a bit dry. (That liquid might include some bits of rice - that’s fine.)
Spread the rice out on a rimmed cookie sheet to cool in a cool location.
2-3 TB each salt and pepper
1/4 tsp marjoram (optional; we did this)
If the pork butt, pork belly, liver and onions have cooled enough (details below) then you can begin grinding these ingredients while the rice is cooling. (You’ll be grinding and mixing together the pork, pork belly, liver and onions.)
Once the rice is cooled, add it to the above and mix to combine. Add salt and pepper (optional: marjoram) to taste. If the mixture seems a bit too dry (and it probably will) add any/all of the remaining cooking liquid required to achieve a slightly mushy texture. It’s very difficult to stuff the casings with a dry mixture.
The rice will begin to absorb that added liquid and before you get to stuffing the last batch, you may need to add even a bit more liquid if the mixture still seems too dry.
As with all sausage making, before stuffing the casings, fry up a bit of the mixture in a small frypan and do a taste test to see if you need/want to add more seasoning.
The casings should have defrosted overnight. They are often packed in salt or a preservative so rinse them thoroughly in cool water before using.
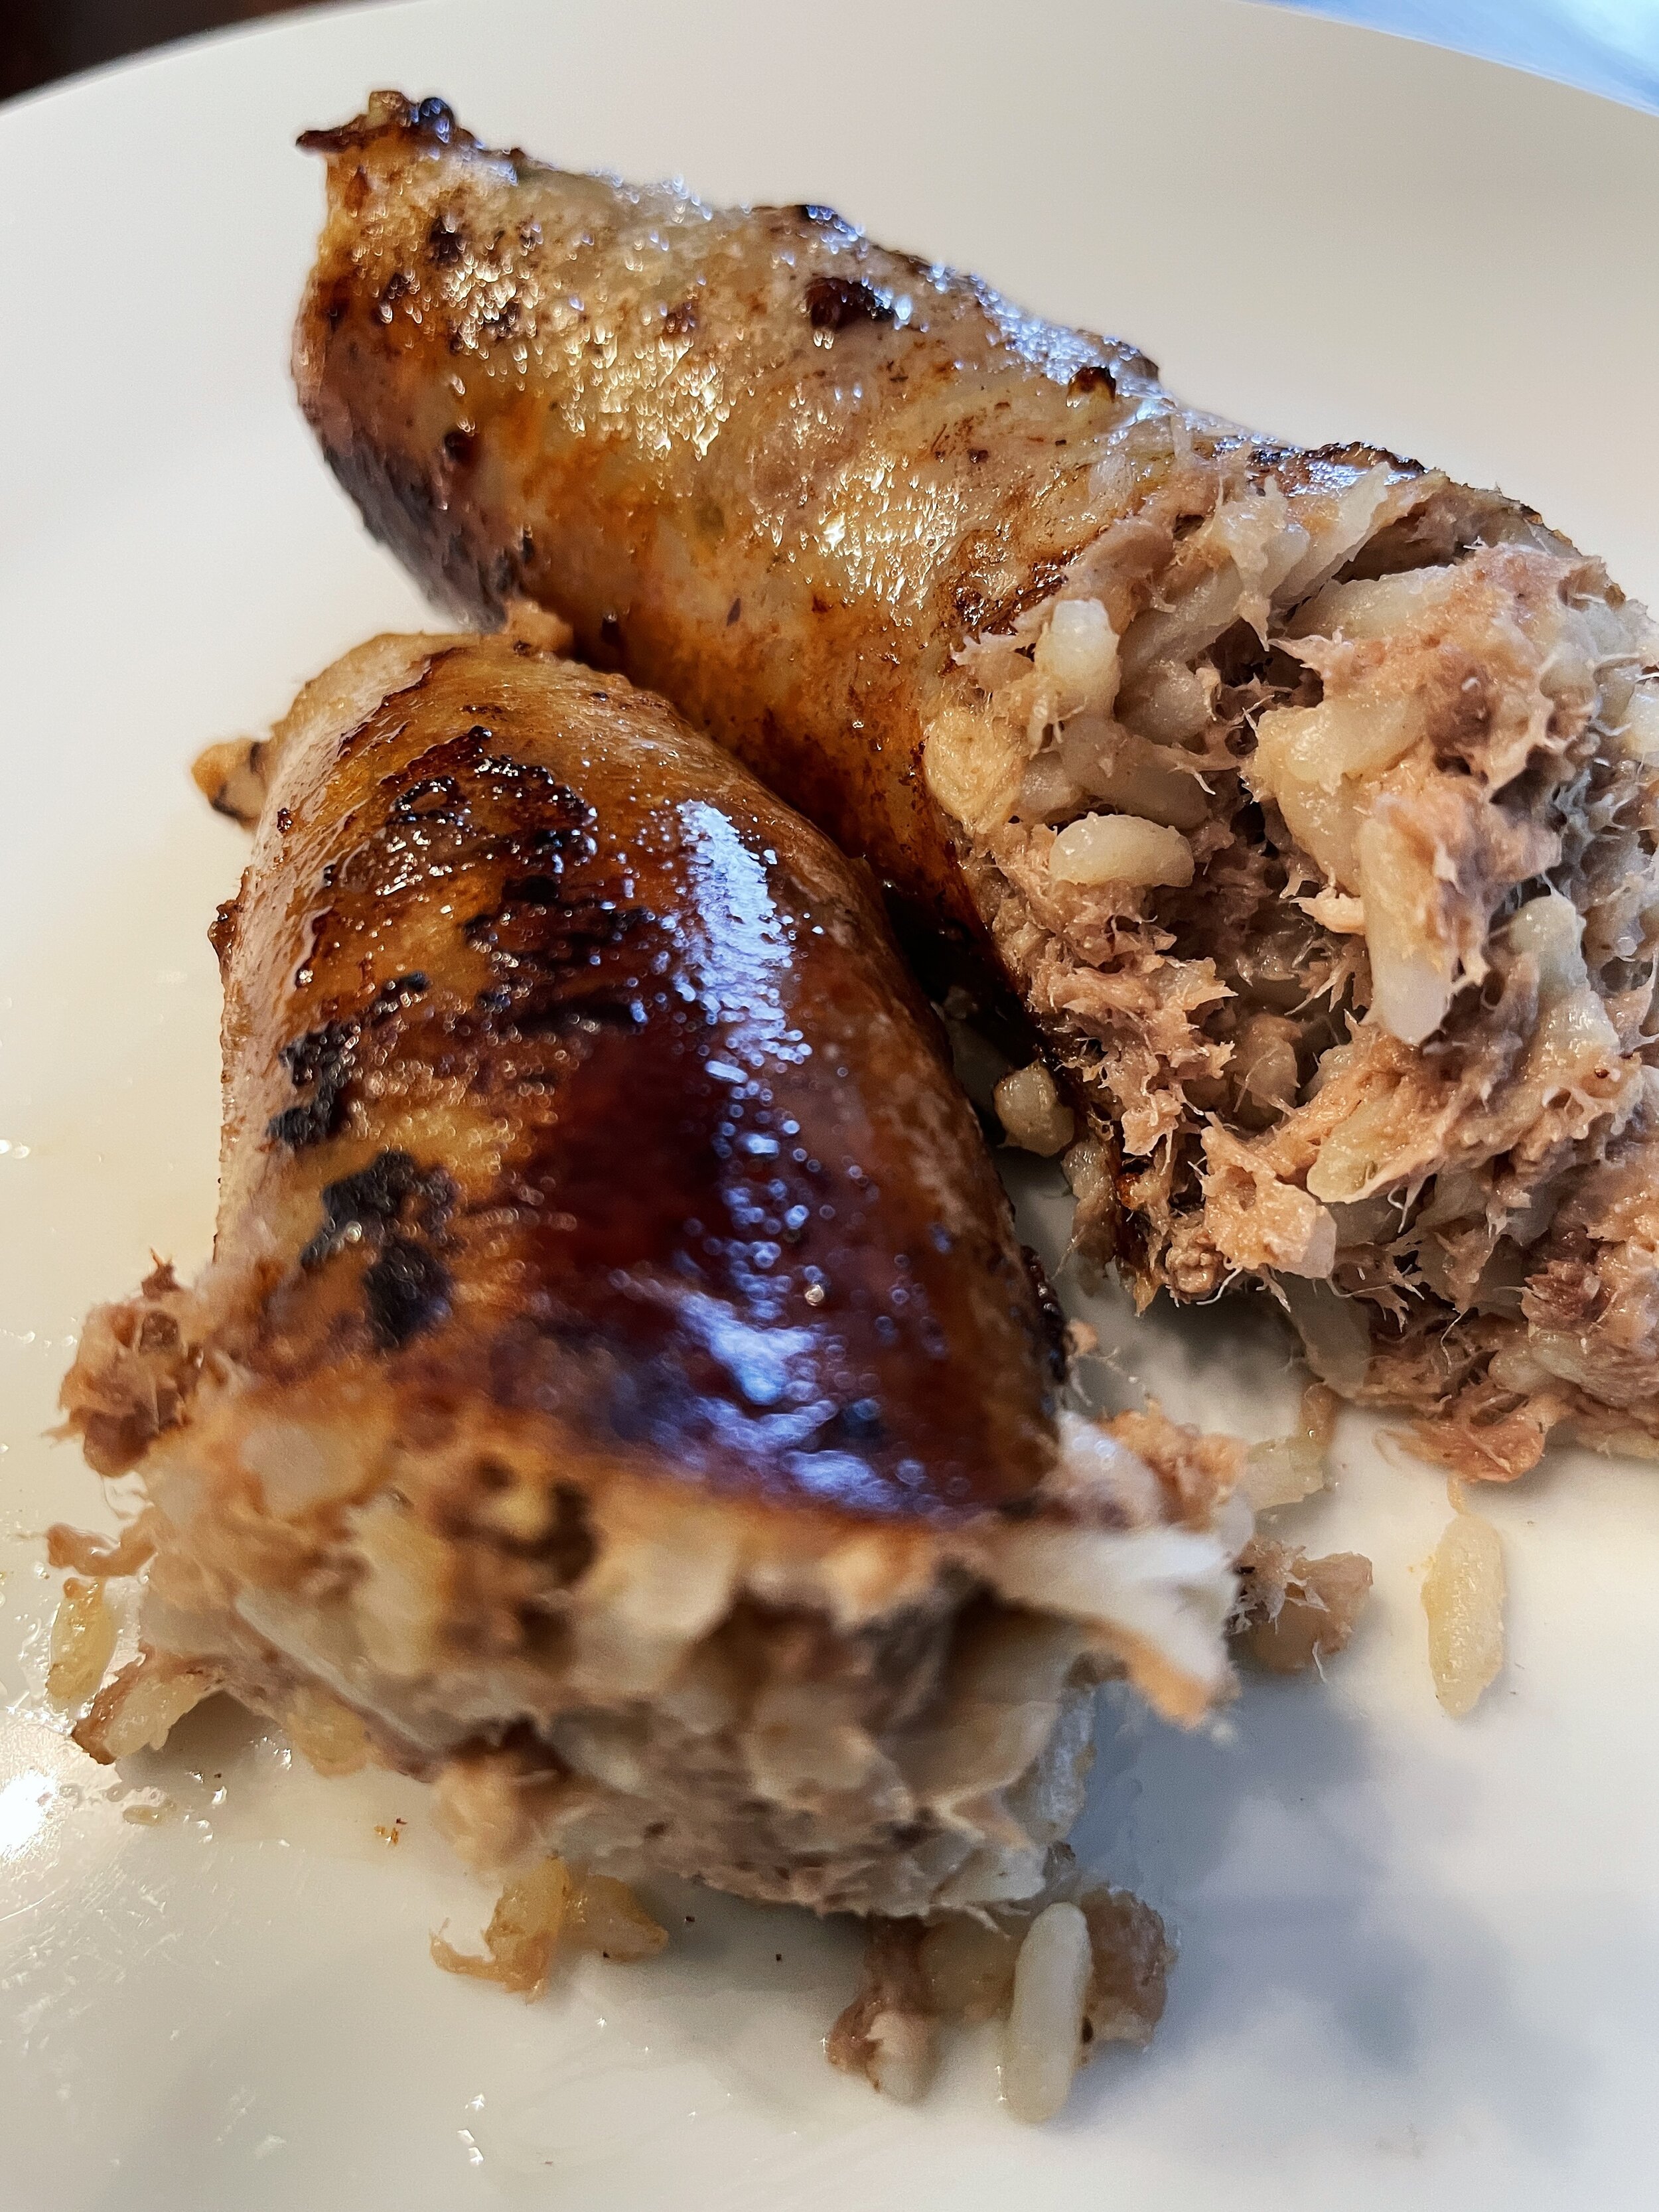
Everything I researched on this stressed that the casings should be filled somewhat loosely. That requires a careful touch at this stage. If they are not filled a bit loosely they are likely to split open when being cooked. Keep in mind that to some extent the rice, even though “cooked”, will continue to expand, and as the sausage rests it will begin to feel more fully stuffed and sturdy.
Place the filled coils in a cool place to rest as you work. Let all the sausages rest in a cool place for 30 minutes or so before preparing them for freezing.
Use a vacuum sealer for optimal freezer storage.
NB - see Notes below - we did not poach the sausage as some (not all) recipes suggest.
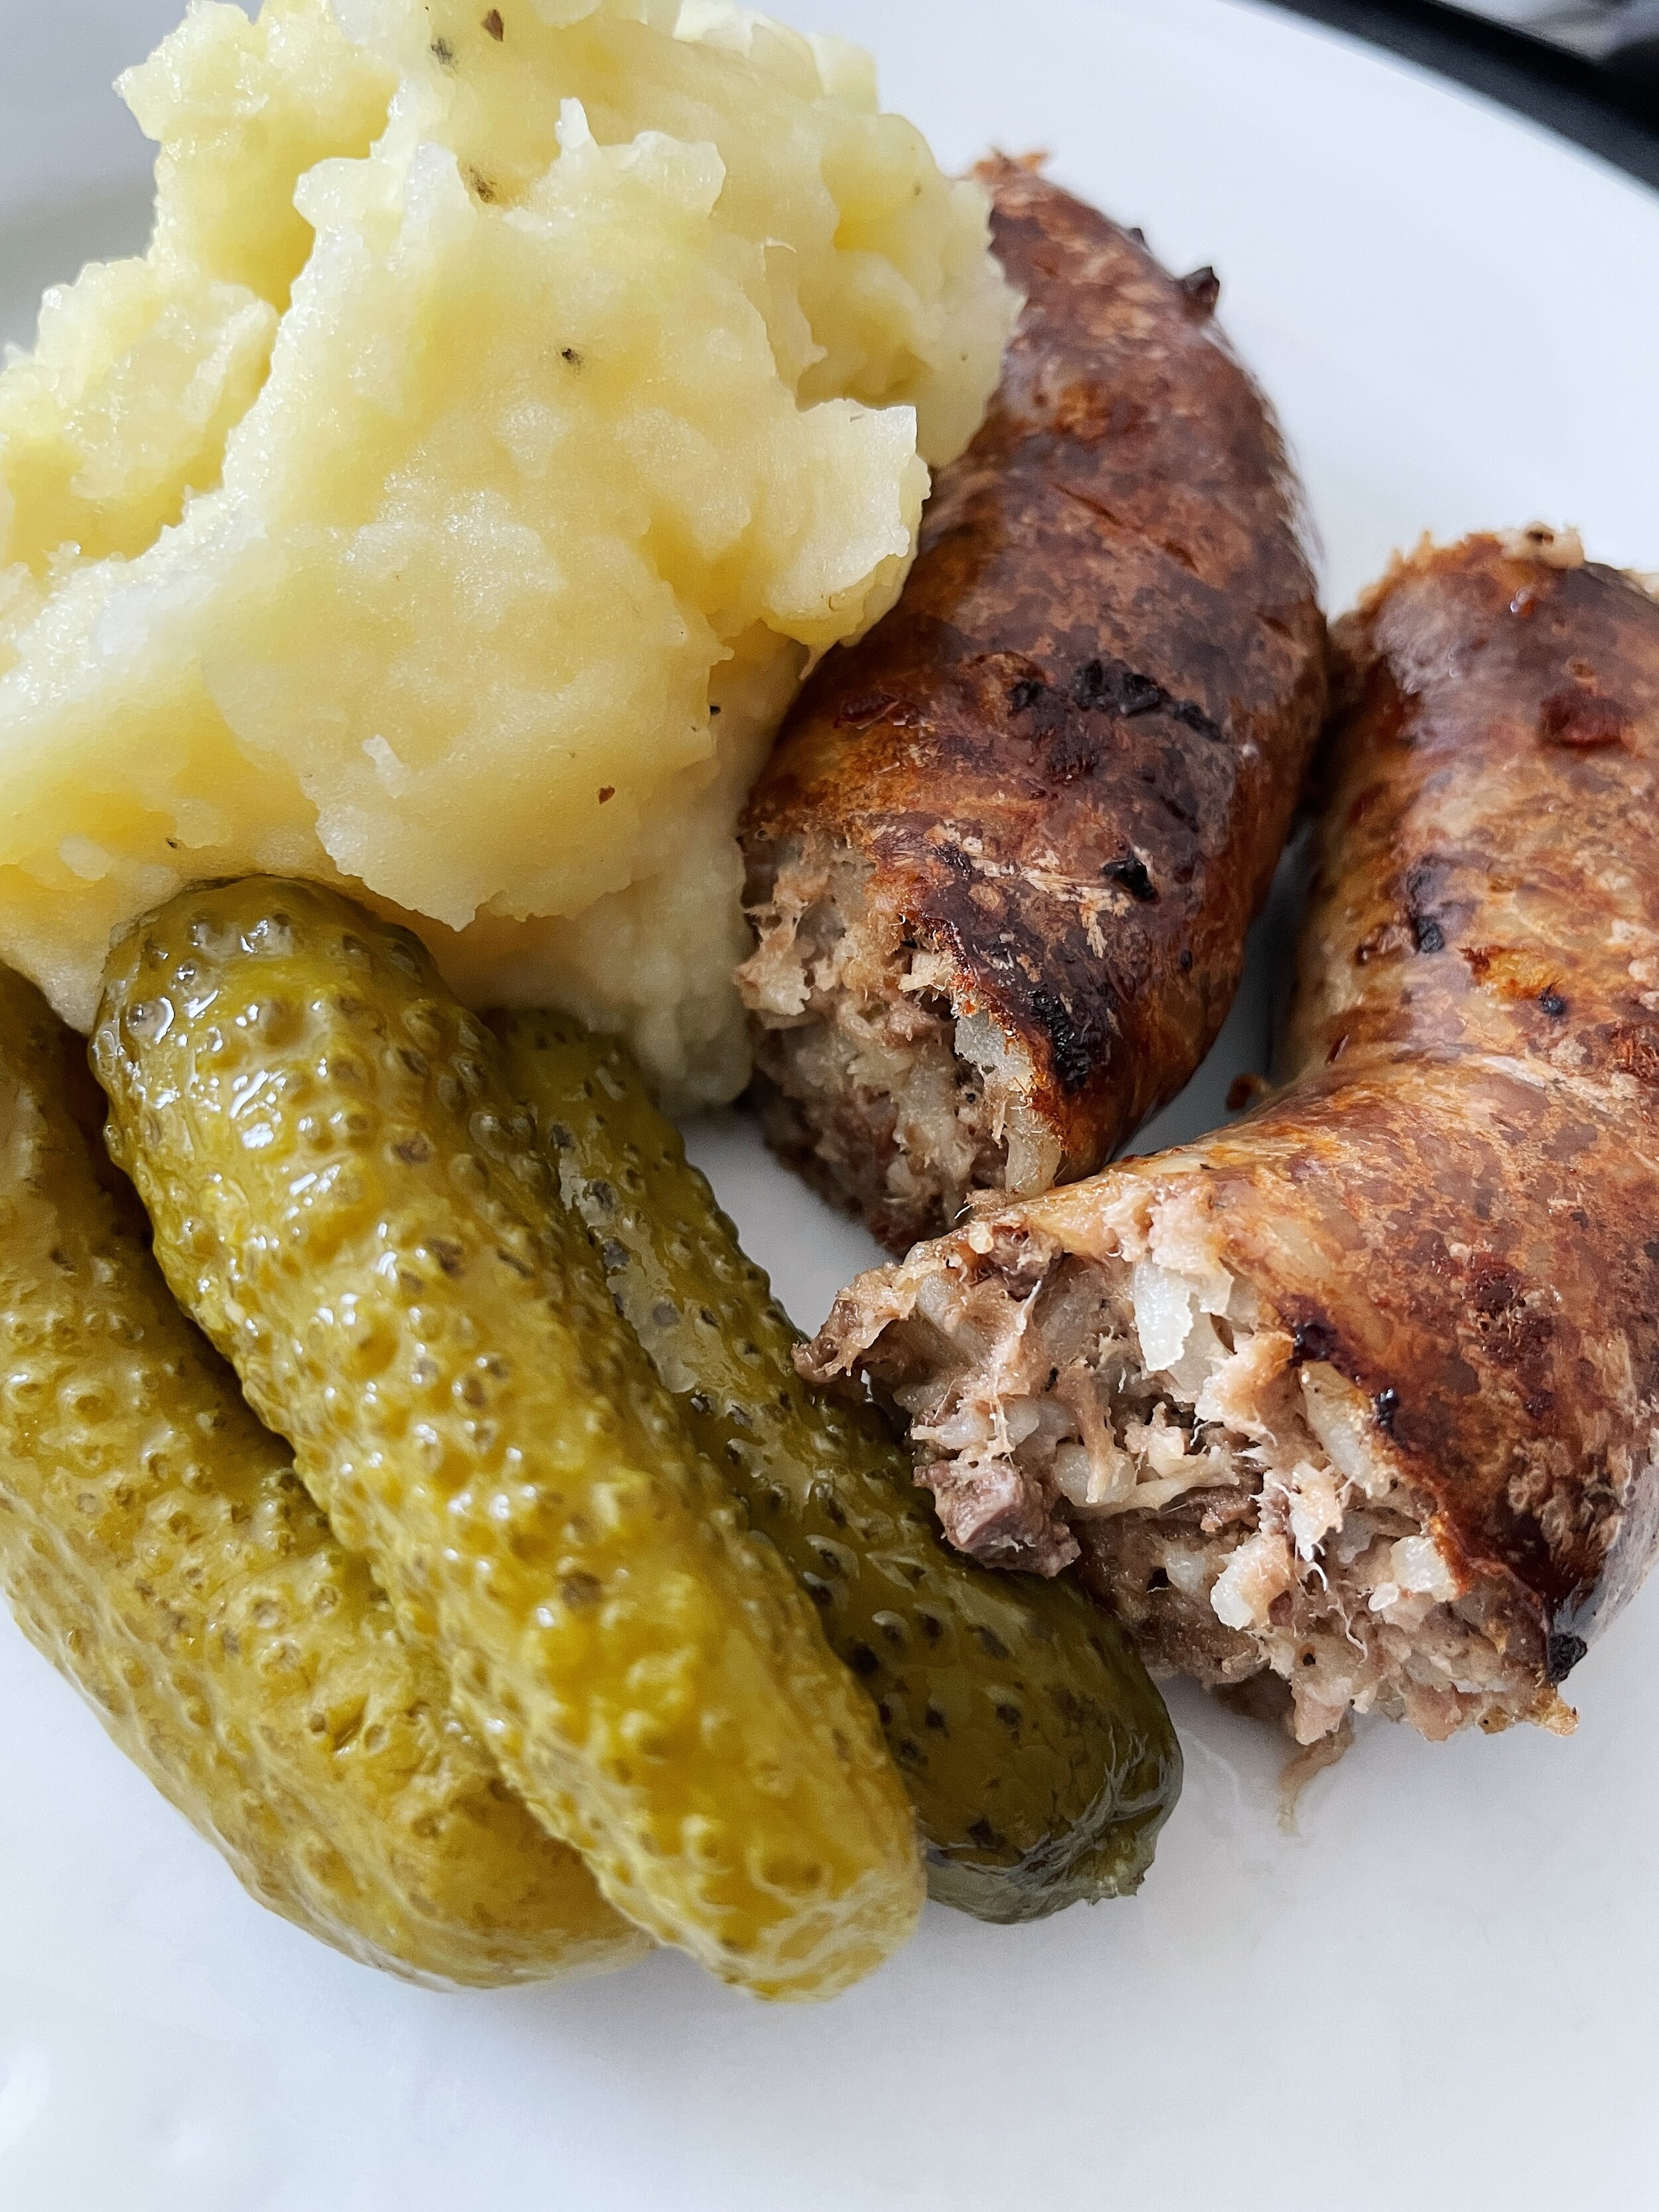
Cooking. Remember that everything in the casing was cooked before so technically you are just warming this up and getting a nice look and feel. A brown, almost crisp, casing is ideal. I find that if I fry this in a pan the sausage only browns top and bottom. Instead, I cook it in a shallow pie plate in an oven preheated (at first) to 325 F. (Use the convection setting if you have it.) Pierce the casing in several places and start with a wee bit of oil. Turn it over several times during cooking and each time you’ll notice the browning intensifies. You can take the temp up to 375 F for the last 15 minutes. This should look nice within 30 minutes. Sometimes the casing splits - oh well, still edible.
Notes and Tips...
Variations - As mentioned above, here’s what some recipes I researched suggest -
adding garlic - not in my family's recipe, we might try adding a bit next time
adding some paprika - have never heard of that and I don’t intend to do that
adding other organs - since this is a sausage often made at an annual village/peasant pig slaughter some recipes add other organs such as lung and heart.
Poaching - a few recipes suggested that after the casings are stuffed they should be poached for about 3 minutes in gently simmering water. My family never did this. I consulted with several people on this. The only reason that one might poach is to ensure all the stuffing ingredients are cooked (e.g. the liver) but in my family’s recipe everything is in fact cooked before stuffing, so this step seems unnecessary. We didn’t poach the sausages.
Pork Belly / Fat - there’s one spot in my family’s recipe where it says “white” bacon/szallona, but we chose a lovely marbled pork belly.
Liver - there seems to be some consensus that this should be pork liver. It’s ideal to deal with a quality butcher who can help you source fresh, top-quality ingredients. Pork liver may have to be ordered ahead of time. Marinating liver in milk softens texture and taste.
Rice - my family always used Uncle Ben’s Converted Long Grain rice - but any kind of long-grain should work. Do not use fast cook/instant rice.
COOLING - safe food temperatures - food must be cooled from 140F (60C) to 70 F (21 C) within 2 hours and then below 41 F (5 C) within 4 hours
<== Visit Latest Recipes to leave Comments or Likes! LOVE to hear from you!
You can personalize how this page PRINTS by copying and pasting the page URL into Print Friendly!