Once upon a time, there was a wee restaurant tucked between two other restaurants. KB son #2 worked there for several years. The breakfast toast and the sandwiches were made using the most wonderful bread / buns - their menu called them "Stone Bread". The source was a mystery that the owners would never reveal. Even trusted staff were not privy to the secret. All they knew was that an old Portuguese man made them in his cellar and delivered them fresh daily.
I was obsessed.
For years, I searched Portuguese bakeries. I’d walk in and look around – nada. I’d ask – “Do you sell any Portuguese buns?” - but what they showed me were just dinner rolls. The mystery remained, and over time my "quest passion" dwindled, until… the day we had burgers at NYC's Zaitzeff and they were served on Portuguese buns/rolls. (See my 2015 blog entry.) The quest was resurrected!
We hunted down more Portuguese bakeries – still no luck. I Googled "Portuguese buns" and reviewed the image results – no luck. I was sharing my story with a chef and in my effort to describe them, pointed out that they were flat, resembling an English Muffin. I heard myself say that word – muffin. I googled Portuguese muffin and tahdah – there they were on display, with links to recipes and the actual name - Bolo Levedo. Apparently they are typical of the Azores, and popular in Cape Cod restaurants.
What followed was hours of reading recipes, all different in what seemed like significant ways. The experimenting began and I have been very pleased with the results. The journey of discovery also resulted in the revelation that, like English muffins, they are not baked in the oven! They are meant to be "cooked" stove top, in a heavy pan or griddle like pancakes. In the end, I found that way too time-consuming and came up with a better way. Read on…
I realize my quest and "great discovery" may be no news to some readers. For me it was fun and rewarding. If you live somewhere where you can buy these – nice.
Getting ready:
ideally, get Bob's Red Mill Artisan Bread Flour
bring butter and eggs to room temperature
line four heavy bake sheets with parchment
measure the dry ingredients into a mixer bowl - you will be using a dough hook attachment
steps are detailed below, but here’s an overview
Step 1 - the butter, milk mixture - cool slightly while doing step 2
Step 2 - activate yeast - will take about 10 minutes
Step 3 - while step 2 is underway beat together eggs and sugar; add milk/butter mixture and yeast mixture
Step 4 - add the above combined wet mixture to the sifted dry ingredients - see details below re mixing/kneading
Step 5 - fist proof of 30-90 minutes; form dough into balls
Step 6 - second proof of 30 + 45 minutes, warm oven to 400 F if you plan to use my “bake method”
Step 7 - bake 18 or so minutes as outlined below
(will take more pictures the next time I make these and add them here)
4 TB butter, room temp
1 1/4 cup milk
Best to place the butter, cut into chunks, into a bowl; scald the milk and pour it over the butter and stir to blend; by the time the butter is melted, the mixture will have cooled a bit - as it must be - when being added to the yeast mixture in the next step. It should not be so hot as to "kill" the yeast. (I once melted the butter first and added the milk which was still too cold from the fridge and it made the butter "clump" - not good.) As this mixture cools to room temperature, activate the yeast. (In the next few steps you’ll be combining this milk/butter mixture, with the activated yeast and a sugar/egg combo. Read on…)
1 pkg active dry yeast
1/4 cup warm water
pinch sugar
[Notes below explain the difference between active dry yeast and instant.] Dissolve the sugar in a small bowl of warm water and add the yeast, giving it a quick stir with a fork. Let it sit for about 10 minutes to ferment. Note: the water should be 105-110 F for the yeast to be activated. Here are some yeast tips from @kitchn.
1 cup sugar
3 eggs
Beat the sugar and eggs together by hand (or mixer) for about a minute. Add the milk / butter mixture and beat for less than a minute. Stir in the yeast mixture.
6 cups flour
1/2 tsp salt
Combine these in a large mixing bowl. Usually the rule for "breads" is wet into dry. Make a hole in the centre of the flour and pour in the wet mixture. Using the dough hook, run the mixer for 10 minutes until the dough is smooth. If you prefer, you can do 5 minutes in the mixer and knead 5 minutes by hand.
First proof. Place the dough in a lightly greased bowl covered with plastic wrap and allow it to rise until doubled in size. Time estimates on this vary and I have seen recipes advising anywhere between 30 to 90 minutes. (Some recipes also prefer to cover the dough with a cloth during proofing rather than plastic wrap.)
Form into balls. After the first rise/proof, transfer the dough to a lightly oiled work surface. Yes, you read that right - not a floured surface - a lightly oiled surface (use vegetable oil). Shape the dough into a log and divide it into pieces. How many? 16-18 - see Notes below. Now form those pieces into balls. There are two tricks to that - stretching and folding, and then rolling them under a cupped hand. This video demos both steps (though she sprinkles the surface with flour, and we're not doing that).
Second proof. Place them on a tea towel lightly dusted with flour (allowing space for them to rise) and cover lightly with plastic wrap. Proof again. (See Notes below for options.) Here's the technique I adopted from King Arthur Flour. I proofed them for 30 minutes as just described, then I transferred the balls to parchment lined baking sheets (spacing them about 1.5" apart). Then I placed a second piece of parchment over the balls and placed the second baking sheet on top of them, and let them proof for an additional 45 minutes - they'll rise to about 3/4" thick. That sounds crazy right? The website claims this keeps the texture dense as they rise. It also turned out to be a great way to "cook" them.
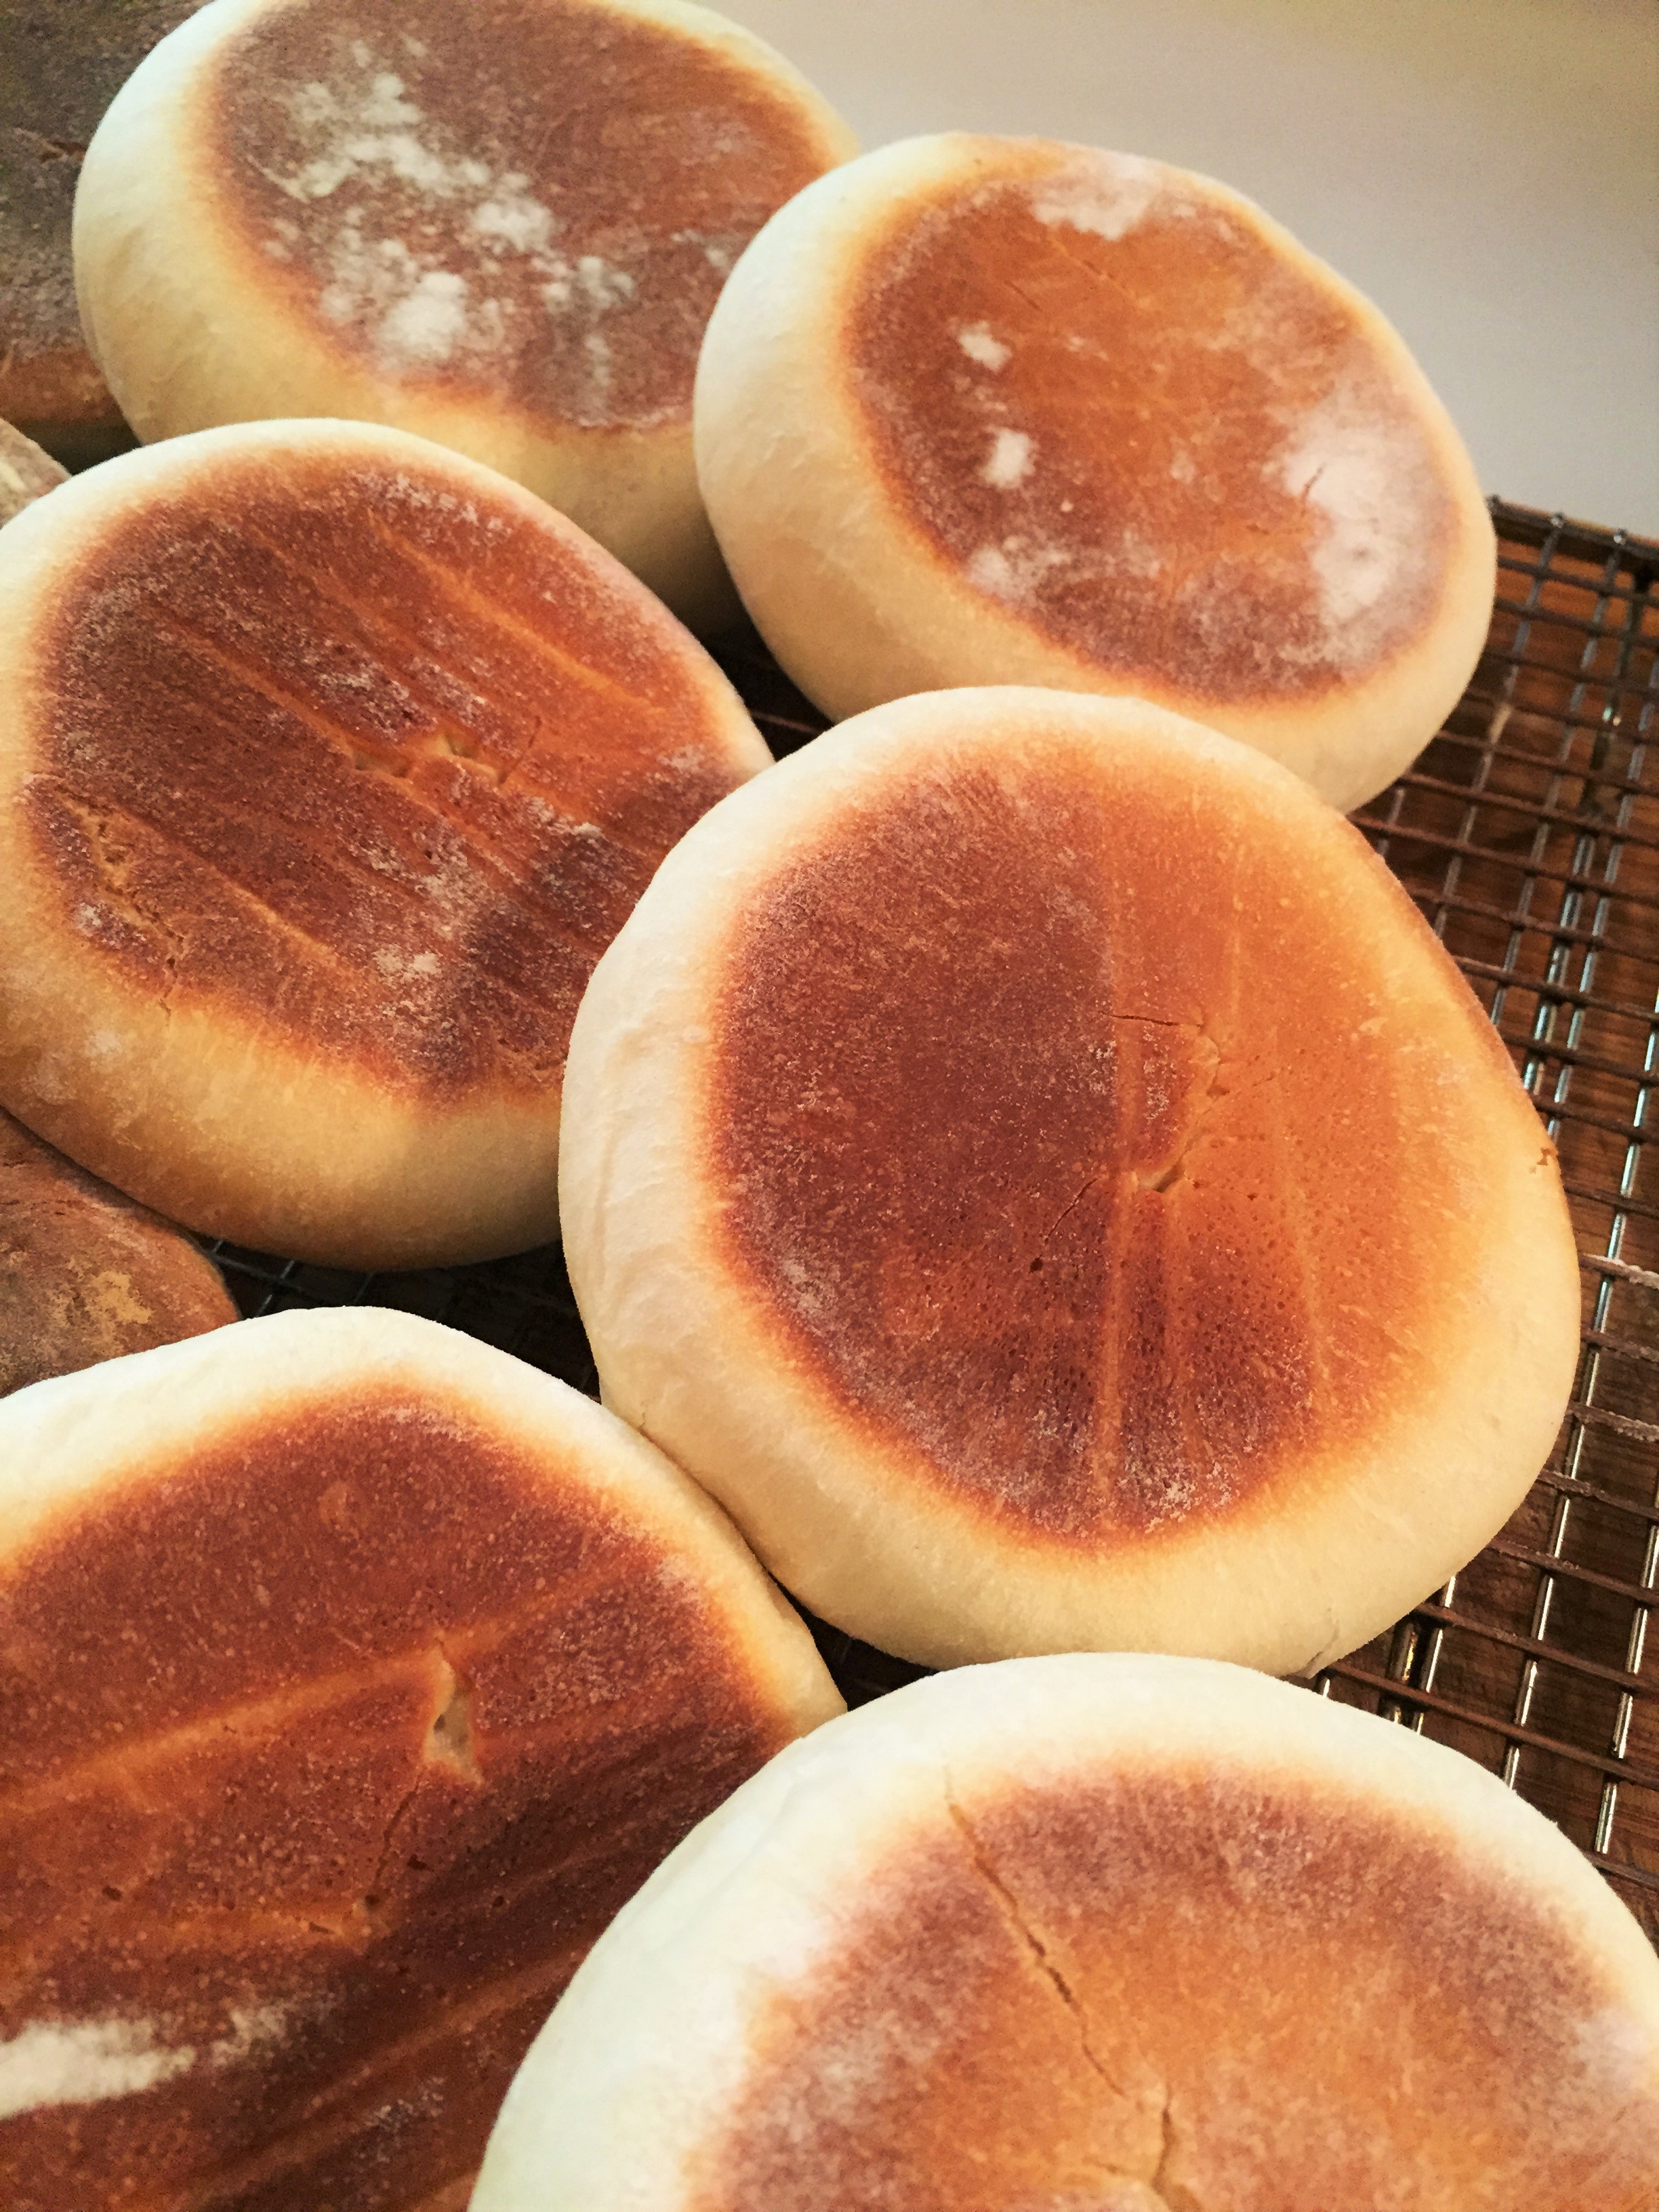
Cook? Fry? Bake? See Notes below where I explain why I opted for this non-traditional method of "cooking" the muffins - in the oven, not in a skillet. Continuing with the the approach used in the King Arthur Flour recipe, place the bake sheet into an oven preheated to 400 F. By “bake sheet” I mean the one described above - the set up described for the second proof - a bake sheet lined with parchment with the 16 pieces, covered by another sheet of parchment and the second bake sheet on top! This helps keep the muffins flat-ish and begins to nicely brown the top and the bottom - without having to flip them half-way through the bake. Bake for 18-21 minutes. If you feel the tops are not optimally browned after that time, remove the muffins from the oven and use the "cook in a skillet" approach, browning the side(s) for an extra 2 minutes (more or less). Cool on a wire rack. These freeze well.
Notes and Tips...
Yeast - note that this recipe uses active dry yeast - not instant; if the labeling is confusing, notice that instant/rapid rise yeast ingredients will list yeast and ascorbic acid. Note the expiry date. Each packet usually contains 2 1/4 teaspoons yeast. Below (under Dry Ingredients Variation) I share a link to a recipe that does use instant yeast - which can be added to the dry mix - no need for the "activation / bubbling" step.
Flour - most recipes called for all-purpose flour. I preferred the results using Bob's Red Mill Artisan Bread Flour. Some recipes added some potato flour, soy flour.
Eggs - some recipes use 4 eggs with the same amount of flour
Dry ingredients variation - the King Arthur Flour version uses a packet of "instant dry yeast", permitting the method of adding the yeast to the dry mix; eliminates the yeast fermentation stage (milk and melted butter are added to all other dry ingredients mixed together). Have not tried that method yet.
How many? The classic Bolo Levedo, though resembling an English Muffin, is larger in diametre. The question is how much larger do you want it to be? If you're splitting these and toasting them for breakfast, or using them for a sandwich - how much bread do you want at one sitting? The first time I divided the dough into 16 pieces; second time I made 18.
Second proof - Time estimates vary - recipes suggest anywhere between 30 to 90 minutes, BUT... here's where I adopted a unique technique. The first time I made these i let the dough balls rise nicely, and then pressed them flat before cooking. Cooking!? See next Note.
Cook? Fry? Bake? Like English muffins, these are meant to be cooked / fried in a heavy un-greased skillet over low heat. I used this method the first time. None of the recipes I consulted specified the time other than "until golden on each side". What the heck does that mean? I was nervous I'd end up with something still raw inside. In the end I settled on 9 minutes per side, but... do the math. Even at the rate of four in the pan at a time, that's 18 minutes for four, and for 16 muffins that's 4 x 18 = 72 minutes!! Not my idea of a good time - which is why I opted for the "bake in the oven" method I describe above.
Baking sheets - the ones I use were recommended by America's Test Kitchen
More variations - some recipes add vanilla, or honey, or some lemon zest.
Recipes I consulted for this "mash-up": King Arthur Flour (oven bake), All Recipes (stove-top), Easy Portuguese (stove-top), Tia Maria (stove-top; huge quantity), and the Huffington Post article that links to Tia Maria.
Sandwich Ideas - the once upon a time restaurant in the middle made several sandwiches. My favs were: Roasted turkey with triple cream brie and cranberry mayo; Grilled chicken with triple cream brie and mango mayo; Grilled veggie with goat cheese spread; Ham and Havarti with pesto mayo.
For KB Recipe Attribution Practices please click here.
<== Questions or Comments about this recipe? Visit the Recipe Q. C. page - looking forward to hearing from you!